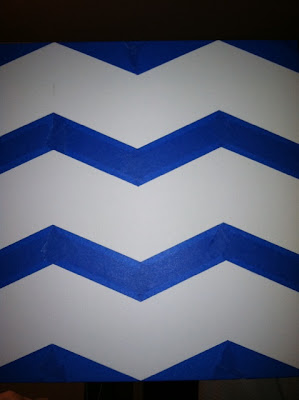
Nope. You aren't dreaming! The title really does have the word Chevron in it & this really is going to be a post about how to make this....
First gather all of your materials...
A canvas (you choose the size)-check Joann's for coupons.
A wooden letter-also from Joann's with a coupon.
2 different color spraypaints-I used yellow and gray.
Painters tape.
Measuring tape.
Then let your hubby offer his help completely take over the project! Spend some time in your cool basement, since the rest of the house is a sauna. He used the paint program to play around with different size stripes.
Next draw your lines. M wrote down the dimensions for what the size of the lines would be. If you would like the sizes please email me (ekedwards4@gmail.com) and I will share them with you. Reason I'm not sharing them now is because the hubs is not home and I don't understand his chicken scratch!
Then you want to tape it off. We knew we wanted it to be gray and white stripes. So we taped off the strips that we wanted to turn out white. You will have to get creative with your tape, ripping it at odd angles.
Take your canvas outside and spray away! It works best if you take the can across once, lift, then take the can back. Does that make sense? Don't worry if you get some spray paint in the grass....it grows :)
Let it dry! I recommend moving it to your basement since lots of little buggies like to sly right into the wet spray paint and get stuck! We have a well ventilated basement with a fan and dehumidifer so it wasn't a biggie to have it down there.
While that is drying take your wooden letter outside and spray that. We chose yellow and I love the pop it adds to the gray! Don't worry about spraying the back since nobody will see it!
We let everything dry for about 24 hours. We did add a second coat to the canvas and letter about halfway through.
Then you want to carefully remove the tape. We did have some spots that bled, but you can't see them when it is hanging on the wall so it doesn't bother me!
Last you want to attach your letter. I don't have a picture of this process because M got too eager and wouldn't wait for me to get home before he glued it down. He used crazy glue. You could use epoxy or gorilla glue. Just something to make it stick. Let that dry before hanging it (something my hubs did not want to do)
And of course take lots of pictures of your awesome work so you can share them with all the bloggie people who fawn over your work!! No? not happening? Ok well at least take a picture to share with me so I can see how yours turned out :)
Like maybe on some baskets on the back porch? Cuz we all know that is exactly where this piece will be displayed...no it won't.
We hung this in our living room. It was a nice replacement to a certain canvas that I ordered and was not happy with the size of it. This piece really added a pop of color to our room too!
Here it is in all it's glory! (please don't mind the cords under the table, I know you have them somewhere in your house too! Any ideas on how to hide them??)
So there you have it! The long awaited Chevron tutorial! The hubs and I have been throwing around the idea of making these to sell for some extra income. What are your thoughts on that? Would you rather try making this on your own or paying someone a small fee to do all of the work for you? I'd love to hear your opinion. With me not having a teaching job, we are getting creative about where our income is coming from! We are currently making another one for my friends wedding present, the colors will match her bedroom!
And don't forget to email me if you want the dimensions! I know I wish someone would have posted the actual dimensions long before it took me Mr. 3 hours to figure it out!!


6 comments:
Wow, it turned out super cute! I love the clean crisp lines and the color contrast :)
I love this. I collect the letter "e" too. I have 32 on my wall. I just might have to make this one! :) Thanks for sharing this idea!
http://estes-extras@blogspot.com
I love it and I love your step by step instructions!Great job!You are lucky to have your hubby joining you and helping you out!
I'm going to follow your blog!
See you around,
Lusine
By the way,why the letter "E"???Does it stand for something???
That turned out so cute!
Thanks friends :) I chose the letter E because my last name is Edwards! Mrs. Estes, I'd love to see a pic of all those letter e's you have & how you have them hung!
Post a Comment
thanks for the love